Local Sourdough Tips and Recipes
Quarantined? Socially Distancing? Self-Isolating?
Whatever the case, there’s a good chance you’re spending more time than usual in the kitchen. And that means you’re probably looking to try some new recipes. Well, it might just be the perfect time to start making sourdough bread.
Why?
“The long fermentation process of creating sourdough brings out the flavours of the flours we put into it. The added bonus that starts as you cut into the loaf and almost taste the aroma, to the lingering aftertaste, is that the fermentation process also takes care of some of the digestion that would normally happen after you swallow. When customers ask me why they don’t feel the bloat and discomfort after eating a sourdough loaf my short answer is, “It happens on the table instead of in your gut.” There are of course many scientific explanations for what is happening, like how the long fermentation process predigests the indigestible amino acids proline and glutamine in the gluten. But more simply put, the artisan approach of slow fermentation is effective in breaking down and neutralizing gluten molecules.” – Sharon Janzen, Alderlane Farmhouse Bakery, Black Creek, B.C.
No idea where to start? Well, it starts simply: with flour and water. One of our contributors, DL Acken, has put together a great step-by-step tutorial on how to start your own sourdough “mother,” but if you’re hesitant about getting started, check with your local baker to see if they will share—Honey Grove Bakery in Courtenay, for example, is offering free sourdough starter to get you going!
Once you’ve made (or ordered!) your starter, you need to get it from bubbling paste into delicious bread. The thing with sourdough is that it’s not a five-minute recipe: it takes an entire day or two to get it just right, depending on the recipe. But that’s why now is the perfect time to try it out, when we’re all spending the days at home anyway!
DL Acken’s tutorial also includes a sourdough recipe with video steps, so you can see the techniques needed to get the perfect loaf. You can incorporate those techniques also into this detailed recipe from Alderlane Farmhouse Bakery.
SOURDOUGH
You will need a digital kitchen scale, a thermometer and a cast iron pot. The timeline given below is tried and proven, and the assumption is that you are working in a room approximately 21 degrees.
This is a versatile recipe to get you going on making three 600-gram loaves, or two larger loaves.
DAY ONE
8:00 a.m. - Levain
40 grams “mother” starter
160 grams white flour
40 grams whole wheat flour
160 grams water at 85-90 degrees
LEVAIN – Stir this together with a spatula or fork to ensure that all the flour is absorbed into your water. What you have just created is the base of what is going to make your sourdough. This will just sit in a covered container for the day.
3:00 p.m. Autolyse – between 6-8 hours after making your levain
770 grams of white flour
63 grams of whole wheat flour
645 grams of water 90-95 degrees
AUTOLYSE – This is a process that helps the glutens to form. Mix the flour and water together in a 12-quart bowl. Have a bowl of water beside you and wet your hands as needed and blend the ingredients just until incorporated.
*Note how the mixture just breaks apart if you pull on it right after you have incorporated. Compare that to what happens 20 minutes from now when you make the final dough and the gluten threads hold it all together when you pull at it.
3:20 p.m. Final Dough
395 grams Levain
23 grams salt
2 grams yeast (1/2 tsp)
FINAL DOUGH – Sprinkle the salt and the ½ tsp of yeast on your autolyse and then add your levain. This is an up-to-your-elbows-in-stickiness process. Have your bowl of water beside you and don’t be shy about dipping in to help you get through this (trying, of course, not to lose your ingredients into the dipping bowl). Dip your hand in your dipping water first, then draw your hand down the edge of your bowl of dough and pull about a quarter of the dough from the bottom of the bowl up and fold the dough over top of itself, working your way around the bowl pulling and folding about 4-6 times. Now pinch your dough, again, working around the bowl grab the dough between your thumb and your other fingers pinching handfuls of dough; what you are doing is incorporating your salt, yeast and levain into the dough without over stretching it.
Pinch about 5-6 times and then do the stretch and fold again 4-6 times around your bowl. Pinch again 5-6 times, then fold again. If your dough is relaxed enough, you can do this pinch, stretch, fold rhythm up to three times. Now let it sit for 10 minutes. **
STRETCH AND FOLD – every 20 minutes for 1 hour total 3 times
Over the next hour, you stretch and fold the dough – no more pinching. Simply work your way around the bowl 4-6 times stretching and folding, then leave it covered for 20 minutes until the last time, when you leave it for a few hours.
8:00 p.m. – SHAPE AND REFRIGERATE
This is the part where you really can benefit from watching some videos on shaping a loaf. On a very lightly floured table and using a sharp table scraper or knife, separate the dough into three 600-gram loaves, or two larger ones if you like. Gently stretch and fold each loaf to create a round. Now you have a definite “bottom” to your loaf where all the folds meet and a smooth top. The idea now is to create a “skin” on the loaf and minimize excess flour being incorporated. You don’t want to break your gas bubbles that have formed because that is where your flavour is being developed! You are drawing your round towards you cupping the loaf gently and pulling it on the table just enough to have it slightly pull and create that skin without breaking the outside and without it getting stuck to the table. Good luck! Really, watch a video, it is way easier to understand what you are trying to achieve.
Use a linen cloth or a tea towel and flour it generously. Cover with a bag that hopefully won’t touch the dough and if it looks like it will, then give the top a little dusting of flour as well. Put them in the refrigerator and leave overnight.
DAY TWO
Any time between 8:00-10:00 in the morning
Heat the oven to 475 degrees and place a cast iron dutch oven into the oven. (I actually use an inverted terra cotta pot with the hole plugged with a washer and eye screw to lift it off.) Heat the oven for at least 30 minutes.
Use a piece of parchment paper to line your pot or pan if you are using the inverted method but only put that in when you are about to bake your bread. If you can only bake one loaf at a time, the other bread can stay in the fridge until you are ready to bake.
Use a sharp exacto knife to make a simple X on the top of your bread so that your bread can expand nicely and not blow out the side. Place the bread in the dutch oven, being very careful not to burn yourself! Bake for 20 minutes at 475 and then turn down the oven to 400 for another 10 minutes. Take off the lid and bake an additional 10 minutes or until your bread reaches a minimum internal temperature of 200 degrees. If your bread is light in colour you can definitely bake it longer. The darker the crust, the more carmelization, the better the flavour.
Now the hardest part – don’t cut into it yet! Sourdough actually builds more flavour if you let it sit for 24 hours. Good thing you baked three loaves since you probably can’t resist cutting into it because it is fresh bread, but try to resist cutting into the other ones and see if you can appreciate the building up of flavour.
**Once you have mastered the process of the straight-forward dough, after these 10 minutes would be when you could add other ingredients – 200 grams of roasted seeds, a pound of cooked bacon bits, or 200 grams of raisins, for example.
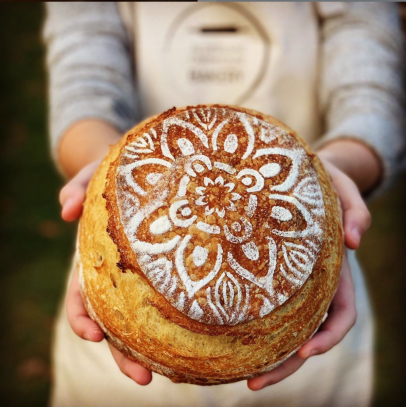
 Photos from Alderlane Farmhouse Bakery's Instagram Page